Introduction
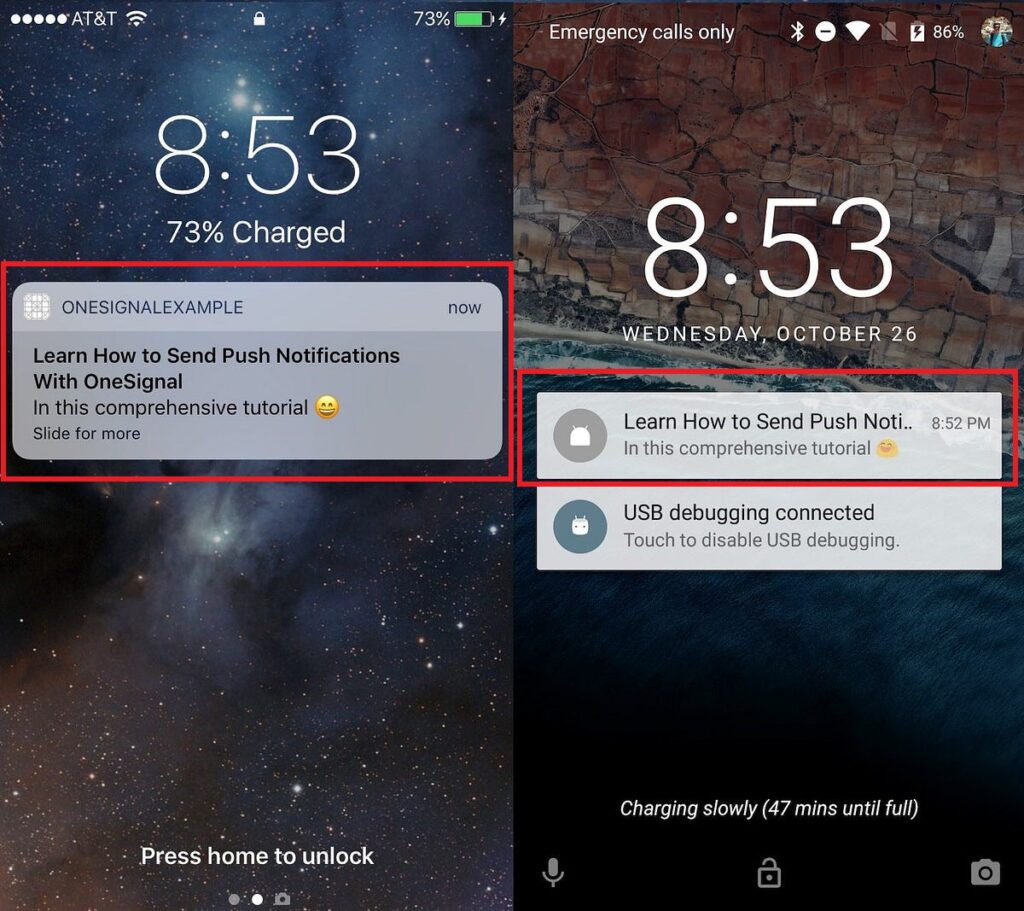
Push notifications are an essential feature for engaging users in mobile applications. In this tutorial, we will explore how to integrate push notifications into your React Native app using Firebase Cloud Messaging (FCM).
Prerequisites
Before we start, make sure you have the following prerequisites:
- React Native Project: Set up a React Native project using Expo or the React Native CLI.
- Firebase Account: Create a Firebase project on the Firebase Console.
- Firebase SDK: Install the Firebase SDK in your React Native project.
Step 1: Set up Firebase Project
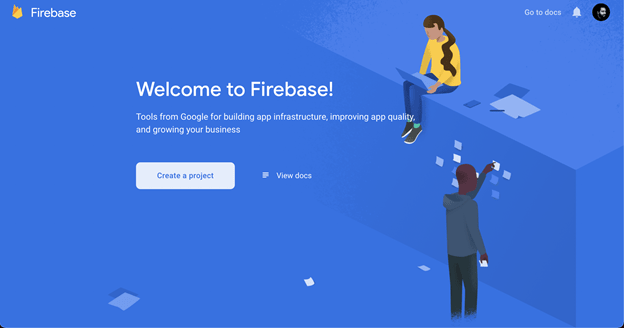
- Login with Gmail and cCreate a new Firebase project on the Firebase Console.
- Add your Android and iOS apps to the project and follow the setup instructions.
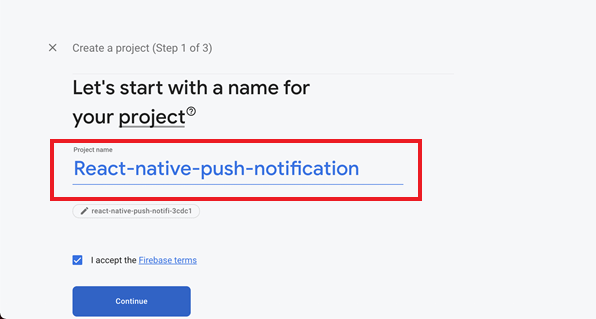
Choose a name for your project, accept the Firebase terms, and click “Continue.”
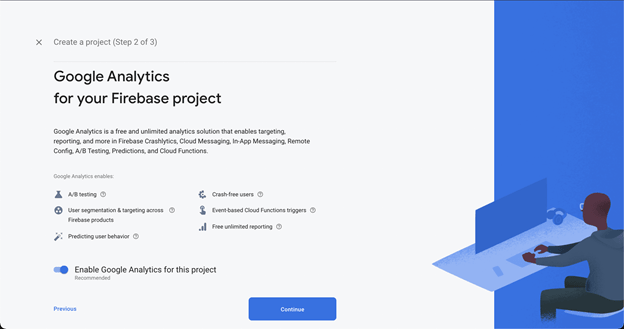
We can choose to enable or disable Google Analytics for the project. (It’s Optional)
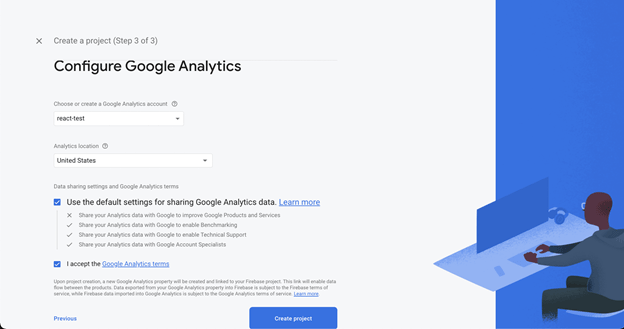
The final step is to select a Google Analytics account, link it with the project, select your settings, and accept the terms. Then, click “Create project.”
Register Your Application
In the Firebase dashboard, register your Android or iOS application.
For Android Firebase Setup:
Register the Android application and give it a name.
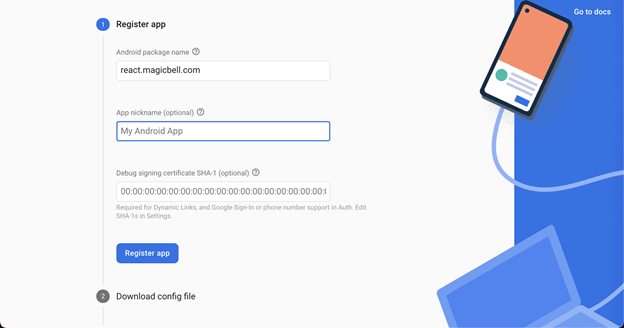
Download the google-services.json file and place it in the root directory (Inside android/app folder) of your application module.
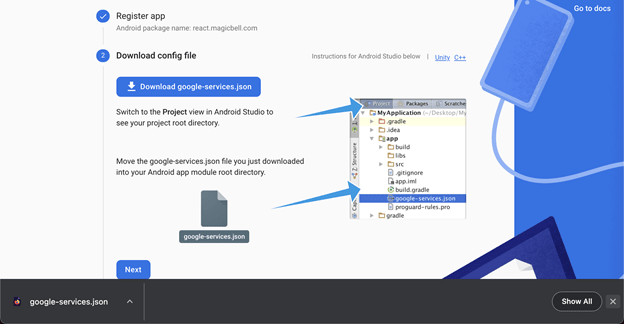
Use the following code and paste for the project-level build.gradle (<project>/build.gradle):
buildscript {
repositories {
// Check that you have the following line (if not, add it):
google()  // Google's Maven repository
}
dependencies {
...
// Add this line
classpath 'com.google.gms:google-services:4.3.8'
}
}
Update build.gradle (<project>/<app-module>/build.gradle)
apply plugin: 'com.android.application'
// Add this line
apply plugin: 'com.google.gms.google-services'
dependencies {
// Import the Firebase BoM
implementation platform('com.google.firebase:firebase-bom:28.2.1')
// Add the dependencies for the desired Firebase products
// https://firebase.google.com/docs/android/setup#available-libraries
}
Add the following code to AndroidManifest.xml
<uses-permission android:name="android.permission.VIBRATE" />
<uses-permission android:name="android.permission.RECEIVE_BOOT_COMPLETED"/>
Add the following code to MainApplication.java
// Add these imports for react-native-firebase
import io.invertase.firebase.app.ReactNativeFirebaseAppPackage;
import io.invertase.firebase.messaging.ReactNativeFirebaseMessagingPackage;

 @Override
    protected List<ReactPackage> getPackages() {
      return Arrays.<ReactPackage>asList(
          new ReactNativeFirebaseAppPackage(), // Add this line
          new ReactNativeFirebaseMessagingPackage() // Add this line
          // ... other packages
      );
    }
For iOS Setup:
Add 'Firebase/Messaging', '~> 6.4.0' to your Podfile. No need to add Firebase/Core (it’s autolinked).
platform :ios, '9.0'

target 'FordDev' do
  pod 'Firebase/Messaging', '~> 6.2.0' // <-- add this line

 target 'FordDevTests' do
    inherit! :search_paths
    # Pods for testing
  end

  use_native_modules!
end
Edit your AppDelegate.m add the following:
#import <Firebase.h>
#import "RNFirebaseNotifications.h"
#import "RNFirebaseMessaging.h"


- (BOOL)application:(UIApplication *)application didFinishLaunchingWithOptions:(NSDictionary *)launchOptions
{

  ...

  // custom
  [FIRApp configure];
  [RNFirebaseNotifications configure];

  ...
  return YES;
}

// custom
- (void)application:(UIApplication *)application didReceiveLocalNotification:(UILocalNotification *)notification {
  [[RNFirebaseNotifications instance] didReceiveLocalNotification:notification];
}

- (void)application:(UIApplication *)application didReceiveRemoteNotification:(nonnull NSDictionary *)userInfo
fetchCompletionHandler:(nonnull void (^)(UIBackgroundFetchResult))completionHandler{
  [[RNFirebaseNotifications instance] didReceiveRemoteNotification:userInfo fetchCompletionHandler:completionHandler];
}

- (void)application:(UIApplication *)application didRegisterUserNotificationSettings:(UIUserNotificationSettings *)notificationSettings {
  [[RNFirebaseMessaging instance] didRegisterUserNotificationSettings:notificationSettings];
}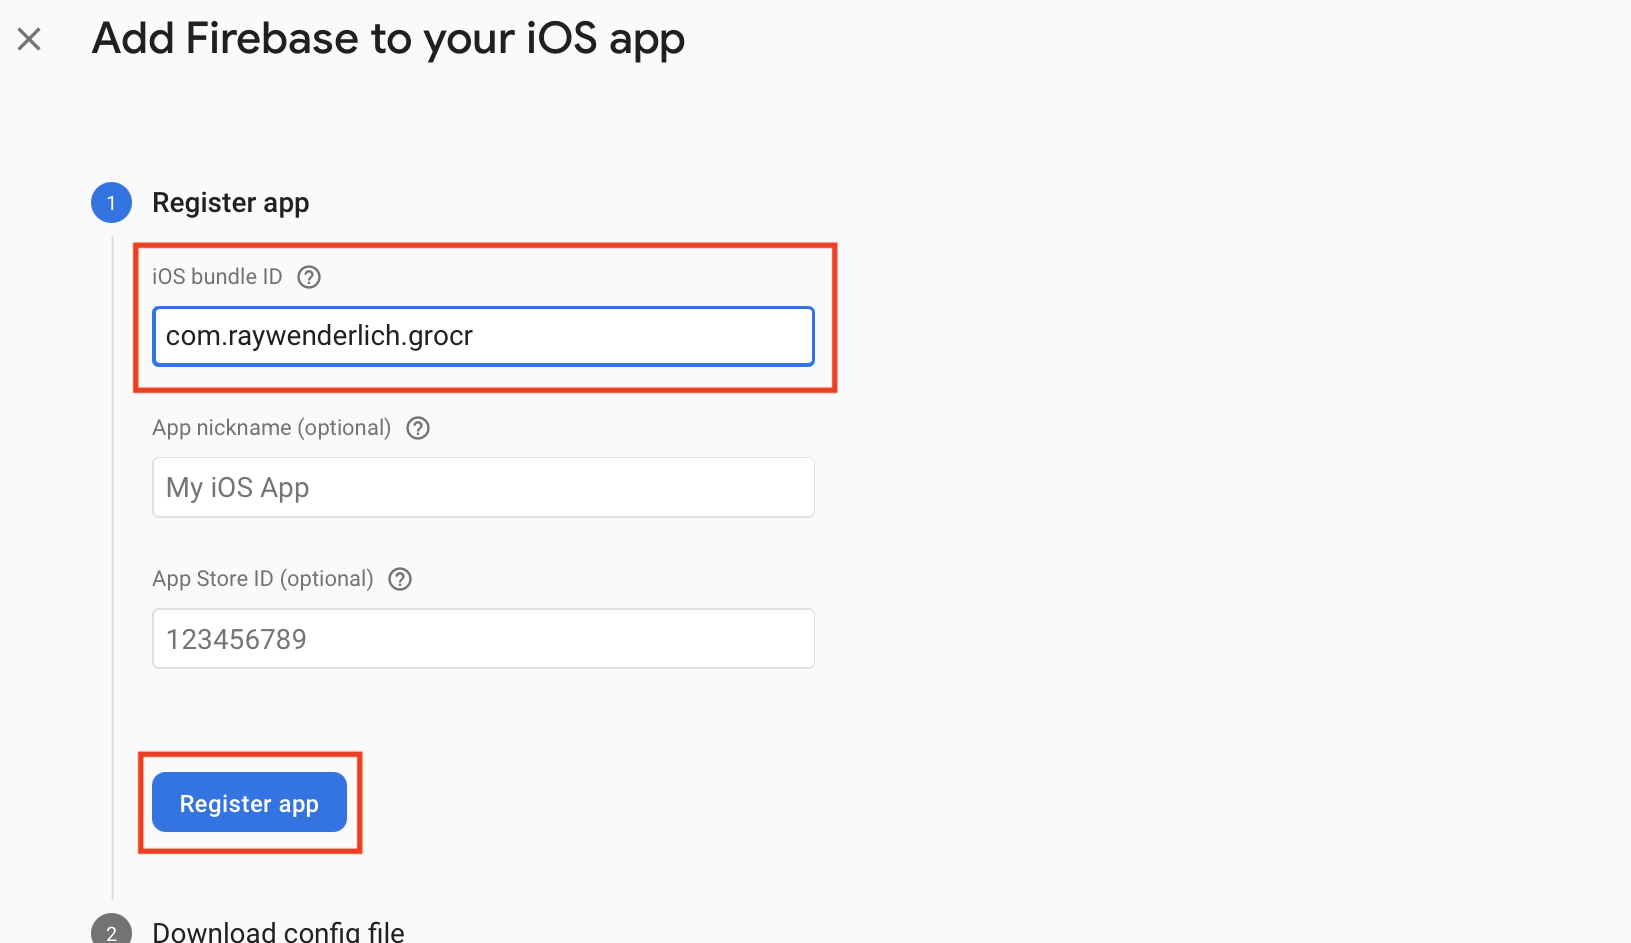
App Store ID is optional
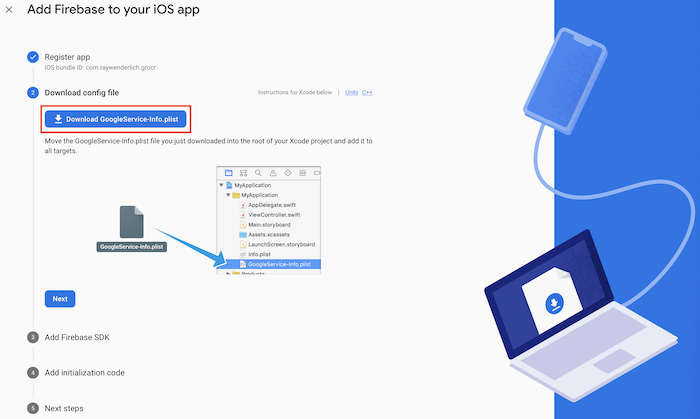
Additional Steps for iOS
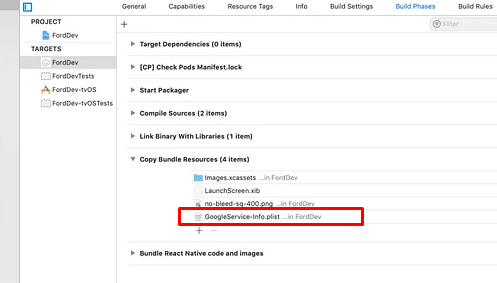
1. Add GoogleService-Info.plist to your project folder and then drag it to Copy Bundle Resources
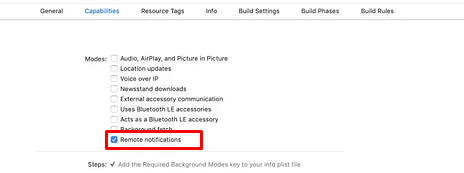
2. Turn on the following capabilities “Remote Notification”
3. Create a .p8 file if you haven’t already. You just need one for your apple developer account. Before you needed a .p12 certificate per app and per environment.
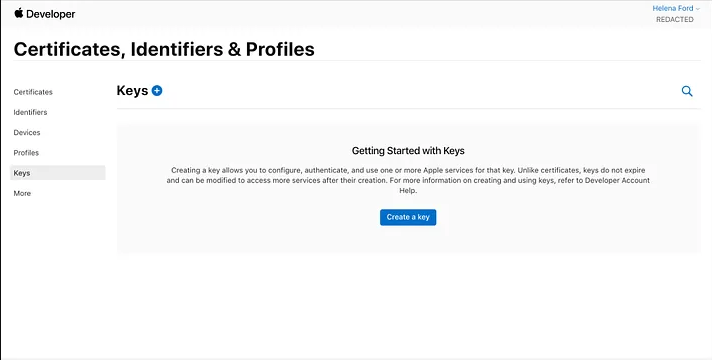
Enable Apple Push Notification Service (APNs) and enter a name.
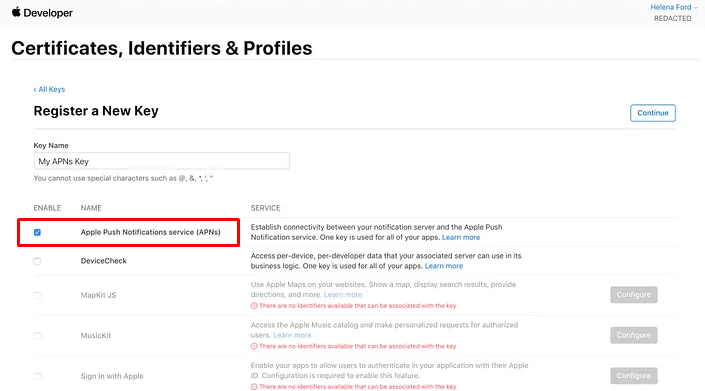
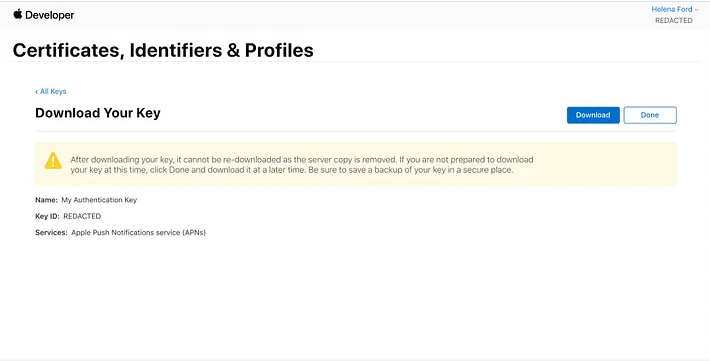
Keep the Key 🔑safe, in a secure location. Keys cannot be downloaded again.
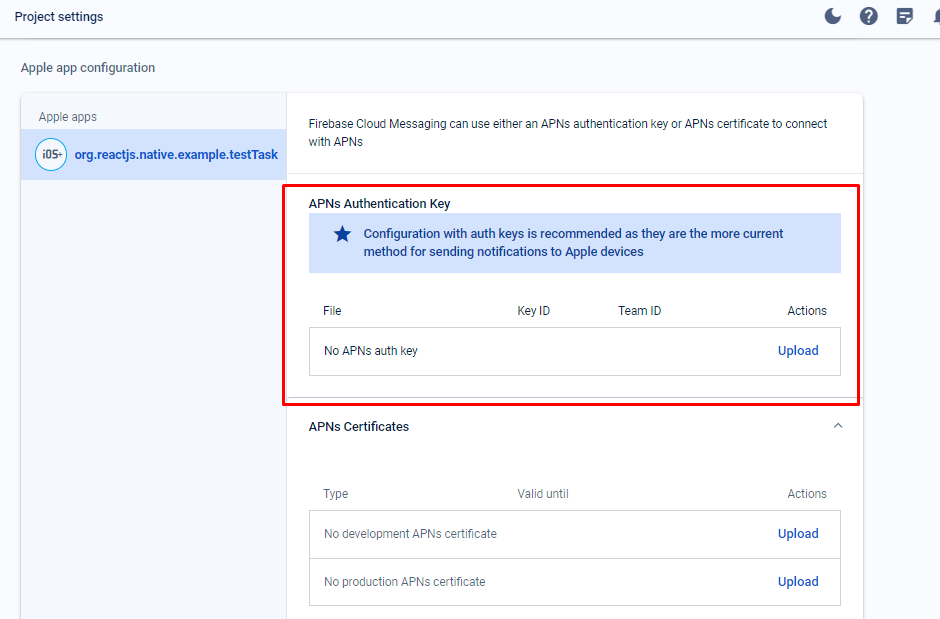
In your firebase project, go to Settings and select the Cloud Messaging tab. Scroll down to iOS app configuration and click upload under APNs Authentication Key.
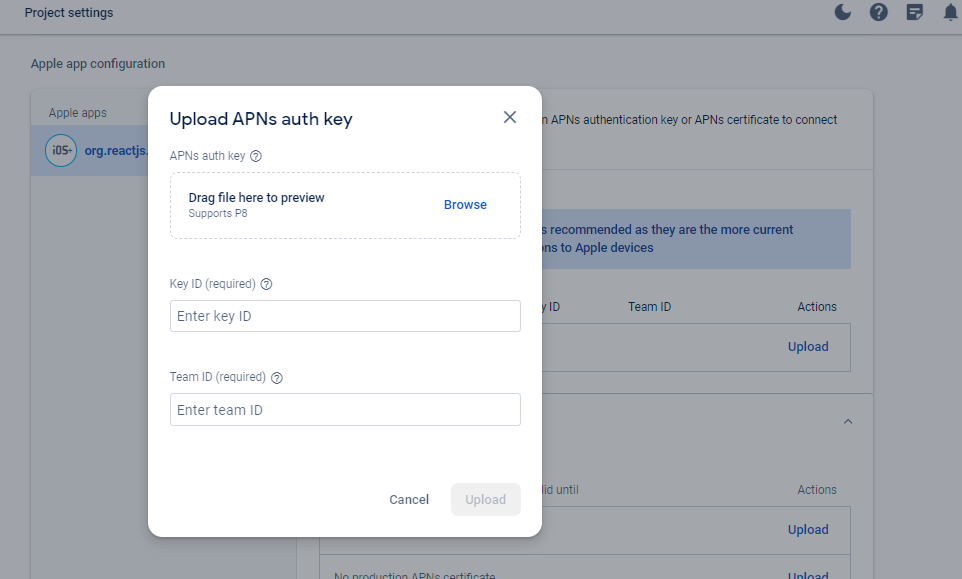
Enter Key ID, Team ID and Upload .P8 File.
Step 2: Install Firebase Dependencies
In your React Native project, install the necessary Firebase dependencies:
npm install @react-native-firebase/app @react-native-firebase/messaging
Step 3: Configure Firebase in your React Native App
- Initialize Firebase in your
index.jsorApp.js:
import { AppRegistry } from 'react-native';
import messaging from '@react-native-firebase/messaging';
import App from './App';
import { name as appName } from './app.json';

// Initialize Firebase
messaging().setBackgroundMessageHandler(async remoteMessage => {
  console.log('Message handled in the background!', remoteMessage);
});

AppRegistry.registerComponent(appName, () => App);
Step 4: Request Permissions
Implement a function to request notification permissions from the user:
import messaging from '@react-native-firebase/messaging';

const requestNotificationPermission = async () => {
  try {
    await messaging().requestPermission();
    console.log('Notification permission granted');
  } catch (error) {
    console.error('Error granting notification permission', error);
  }
};
Step 5: Handling Incoming Notifications
Handle incoming notifications in your app:
import messaging from '@react-native-firebase/messaging';

messaging().onMessage(remoteMessage => {
  console.log('Foreground Message Arrived!', remoteMessage);
  // Handle the notification here
});
Step 6: Handling Background Notifications
Handle notifications when the app is in the background:
import messaging from '@react-native-firebase/messaging';

messaging().setBackgroundMessageHandler(async remoteMessage => {
  console.log('Background Message Arrived!', remoteMessage);
  // Handle the notification here
});
Step 7: Send a Test Notification
Test your implementation by sending a test notification from the Firebase Console or Postman API.
Next, open the Postman app:
Method: POST
Url: https://fcm.googleapis.com/fcm/send
Headers: Content-Type of `application/json`
Authorization of Bearer <ServerKey>
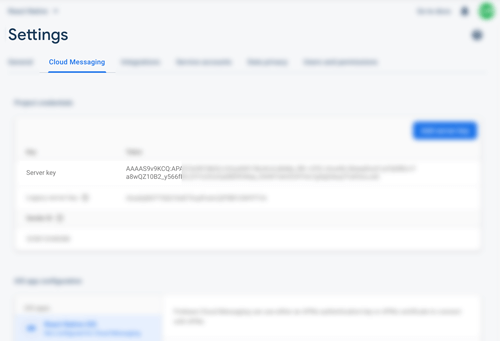

n the body tabs, choose the RAW and fill with the JSON like below.
{
    "to" : "cFgZQf_bGtc:APA91bF0xbAObLc1CwyBe8lINHaZ_V2PvmsYJ53URUYT1gQwBcglYIi_fdnnpl7KEkNeWOZgmaTWu-hsFGDT7BNaMsEZl37VybPHSXaU0vKZwMl6HfV8VzZlmluIbHTqxwSD7r8Fmy4i", // FCM Token
    "notification" : {
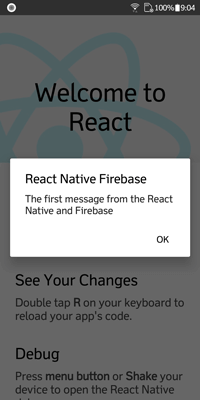
        "body" : "The first message from the React Native and Firebase",
        "title" : "React Native Firebase",
        "content_available" : true,
        "priority" : "high"
    },
    "data" : {
        "body" : "The first message from the React Native and Firebase",
        "title" : "React Native Firebase",
        "content_available" : true,
        "priority" : "high"
    }
}
Output:
Thanks for the strategies you have contributed here. Also, I believe there are some factors that will keep your auto insurance premium straight down. One is, to contemplate buying cars and trucks that are in the good set of car insurance firms. Cars that happen to be expensive tend to be at risk of being snatched. Aside from that insurance coverage is also in accordance with the value of your vehicle, so the more pricey it is, then higher a premium you spend.